Great places to learn

Welcome back to my blog today I am going to share some great places to learn more about Blacksmithing.

For any reader who isn’t from the twin cities, Western Wisconsin area this information may not be accurate (just research blacksmiths near you and start learning).

Now back to Western Wisconsin, I’ve found that if you learn Hands-On from a club or apprenticeship it works really well in my area there is the Badger blacksmiths club and the guild of metalsmiths which are some great sources for knowledge on blacksmithing and other metalworking Topics.

There are also some blacksmithing classes you can take in my area like vanmadrome metalworkers, Chicago Avenue fire art center, Minnesota school of horseshoeing  If you decide to go to one of these schools you may have to to get an OSHA certification to go into the shop so they know you can be safe in the workshop but if you join a club all you need is some safety glasses.

Sorry this post is so short and thanks for reading.

Beginning things to make

Welcome back to my blog. Today I will give you some great beginner blacksmith things to make that will help you learn some useful skills.

When I joined the Badger Blacksmiths club I took a beginner class where we were taught some good beginner tools and techniques to practice. To get better at blacksmithing you have to learn things like round and flat tapering, scrolling, splitting, bending, twisting, rounding, and punching (not with your fists).

Tapering

For square tapering, start on the very end of the piece hitting the top side then a 45° turn to the side. Hit there then turn it to the side you turned from going up untell you are satisfied.
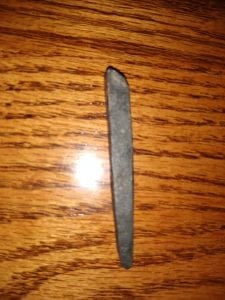
To make a round tapper take the square tapper and nock down the corners to make it an octagon. Then take the corners down then just tapping in a circle.

Scrolling

When you are making a scroll, you do the same thing with the tapper except you don’t do the 45° turn you just straighten. Once you are happy with the length, you put a little bit over the edge, tapping down and going forward so it makes a U shape. Tap the end until it looks like a curl and keep slightly tapping the back of the curl to continue it to your desired size.
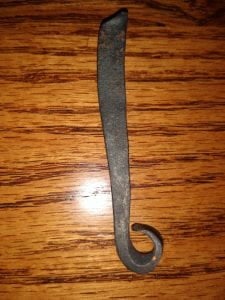
If you only use half of the scroll you can make a coat hook (this is also known as bending). You’ll need to do a bit of flattening for the upper part of the coat hook.


Splitting

Splitting is pretty easy (except for the fact that you need a specific tool, a splitter/ hot cut which is a piece of metal that is a tapper brought to a sharp point for you to cut with). To start your cut, you just set your hot cut tool where you need to cut and just hit the back until you cut as far as you need (make sure to cool your tools so they don’t lose their temper).
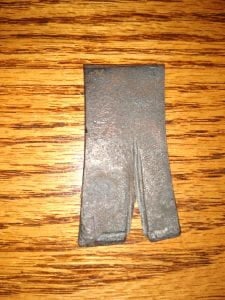
You can use this skill to make many things like tongs or two-sided coat hooks with one screw plate.

Twisting

It is pretty straight forward. Take the piece you want to twist (I recommend a square piece because it looks more professional) and grab one end with a leg vise and the other with a wrench. Twist until you are happy.
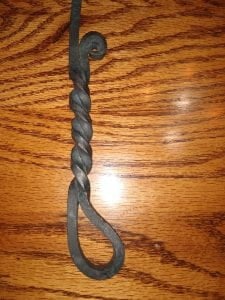
If you want to twist two ends of a piece together you can make a great handle by grabbing both of the ends you want to twist.

Punching

To make a hole in a piece, you can take a punch and drive it through the piece to make the hole a satisfactory size (I recommend punching from both sides to make it even).
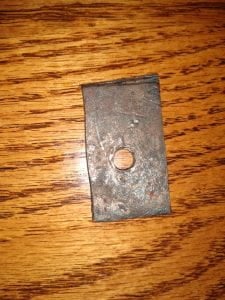
I hope this post will help you get better at honing your craft. Happy reading from this backyard blacksmith.
tools for the forge

Hi, welcome back to my blog on the last post I talked about what you need to make your own forge. In this post, I will be sharing some places where you can find some good tools for your forge and tools in specific that are helpful. do to the size and quality of some of these items they may cost a lot for the beginner blacksmith.

1. From blacksmithsdepot.com, there are some great tong choices. Some of them can cost from $30-$185 depending on the type and size of the tongs I suggest the Scratch-N-Dent v-bit tongs or the normal V-bit tong.

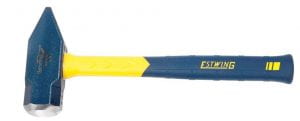
2. From blacksmithsdepot.com, there also are some great hammer choices. these can cost from $12-$210 also depending on size and type I recommend getting a Swedish style hammer and rounding hammer. you can also find some decent hammers at The Home Depot, Menards or Ace hardware like this hammer.

If you decide to get a hammer from one of these stores make sure you don’t get a carpenter’s hammer the one with the nail pulling end on it.  hi

3. From harbor freight there are some decent anvils the only thing is they don’t have great horns.

4. You can also find some higher quality anvils on amazon

I really hope this blog post helped you find some good tools for your forge and happy forging.

First things for your forge

Hey, how are you? So you want to try blacksmithing, well then here are all the materials you need to make a gas forge.

  • 2 propane tanks
  • one 5 foot hose
  • 3-inch long small copper pipe with small holes on one side
  • 2 couplers
  • 7-inch pipe
  • kale wool blanket
  • Satanite refractory
  • fire brick

You may need a plasma cutter, hacksaw, angle grinder, and welder.

Image result for images 25 foot propane hose Image result for kale wool blanket

Step One

Make sure the tank that you’re using for the forge is completely empty.  If you don’t, when you start cutting with the plasma cutter or grinder you will blow yourself up. Leave the empty tank open for 24 hours in a well-ventilated area so all the gas residue can leave the tank.

Step Two

After you’ve made sure the tank is empty, cut a 4 by 3-inch hole in each side of the tank and one hole at a 45° angle from the top for the pipe that attaches to the gas hose. Then cut the handles and base off the tank, making the outside smooth with the grinder.

Step Three

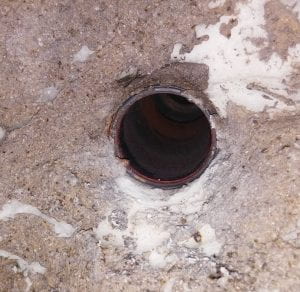
Put the fire brick on the bottom of the hole for the metal project to sit on. Then put the kale wool down around the rest of the inside of the tank painting the refractory on top.  Smoothen it out, making sure the hole for the gas to go through is open and protected.
Step Four

After the refractory is set, weld a base onto the bottom of the tank. After that, make a stand with holes or a bar for tongs.

Step Five

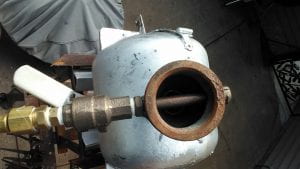
Connect the large pipe with the small pipe inside, to the forge. Connect the tubing to the pipe with a valve.

Step six 

Connect the valve to the tube on the other end, then connect it to the full propane tank.

Step Six 

Open the valves, then light the forge so it makes a steady sound. Enjoy your forge.